Creating an Invoice
There are several ways the user can approach the invoice creation page.
- Clicking New in the Invoice Management page
 2. Clicking on "Create Invoice" in the menu

In this section, an example usage of invoice creation page will be given, it is recommended that the user follow along to learn how each section works. Otherwise, learning how to use the page on your own is easy! Most icons in this page contains tips that the user can find when the user hovers on the question mark symbol (?) or any other icons.
The Menu
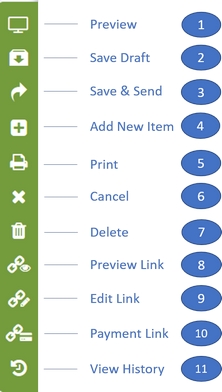
The menu shows actions the user can perform for that invoice.
Note :
The menu will show different types of Action depending on the invoice's status. The relationship for these buttons can be seen on Invoice Status & Payment Status section.
Invoice Information
 Fill out the necessary details about the invoice such as the "Invoice Number", "Reference" (if any) and the "Due Date". Clicking on the "Custom Due Date" shows options to change the due date to other pre-made dates or manually set the due date by typing or clicking on the down arrow at the date box, which shows a calendar to select the date.
Customer Information
 In the "Bill To", there are three fields which the email can be inserted to. The difference between the three fields can be seen in the table:
| Field | Receiver can |
|---|---|
| View and Pay for the invoice | |
| CC | View and Pay the invoice |
| BCC | View the invoice |
Each field, when clicked, will show all customers' email, which are stored in the Customer page. The user can add new customer(s) in this page directly so that the customer's email can be used immediately without having to go into the Customer page and come back to this page.
Additional Information on how the Customer section of the service works, please refer to the Customer section of this guide.
A new customer email can be added by clicking on the "+" button. The "First Name", "Last Name" and "Email" field of the popup are required, but not the phone number.
 Once added, the new email will appear in all of the three email field. If the user wants to add more emails, simply press "+" again.
Note:
The "Email" field does not allow the user to add a new email directly on the field itself, if the user tries to type an email not in the list, the entered email will be deleted.
However, the "CC" and "BCC" fields allow the user to simply add additional recipients to the field so the invoice will be send to the new recipients for viewing. These recipients however, will not be saved into the database. Therefore, if the user want to keep the email information, it is suggested that it be added using the "+" button
Clicking on "Show Additional Customer Information" will show additional dialogs as seen below:

Adding and Managing Item(s) to the invoice

Note:
Number shown in the image above will now be referenced with ( ). For example, when the author writes (1), please refer to where the number 1 in the image is.
Scrolling down, the user will find the Item table, here item(s) can be added to the invoice in multiple ways.
- Clicking on "Add multiple items"
- Directly input the item's name on (3)
- Clicking the magnifying glass button in (4)
- Manually input an item on (3). The added item will not be saved into the list of items, found in Item Management page
Using method 1 - 3, the item will be added to the invoice automatically along with the price as well. The user can then choose to adjust the quantity or price of the item on the table.
Note:
Prices of the item adjusted in the Invoice Creation/Edit page will not change the price of the item set in the Item Management page. This is a one time change only.
Adding an item
An item can be added to the invoice by entering the item's name on (3) or clicking on the magnifying glass icon (4) in the row.
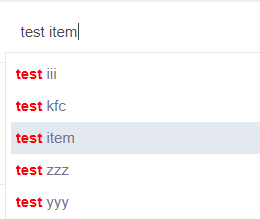
When adding the item via (3), the user can type the item name in the text field, a list of possible item that matches with the input text will be shown. Then, select the matched item to add it to the invoice
When adding the item via (4), the user will receive a pop-up that looks like the image below:
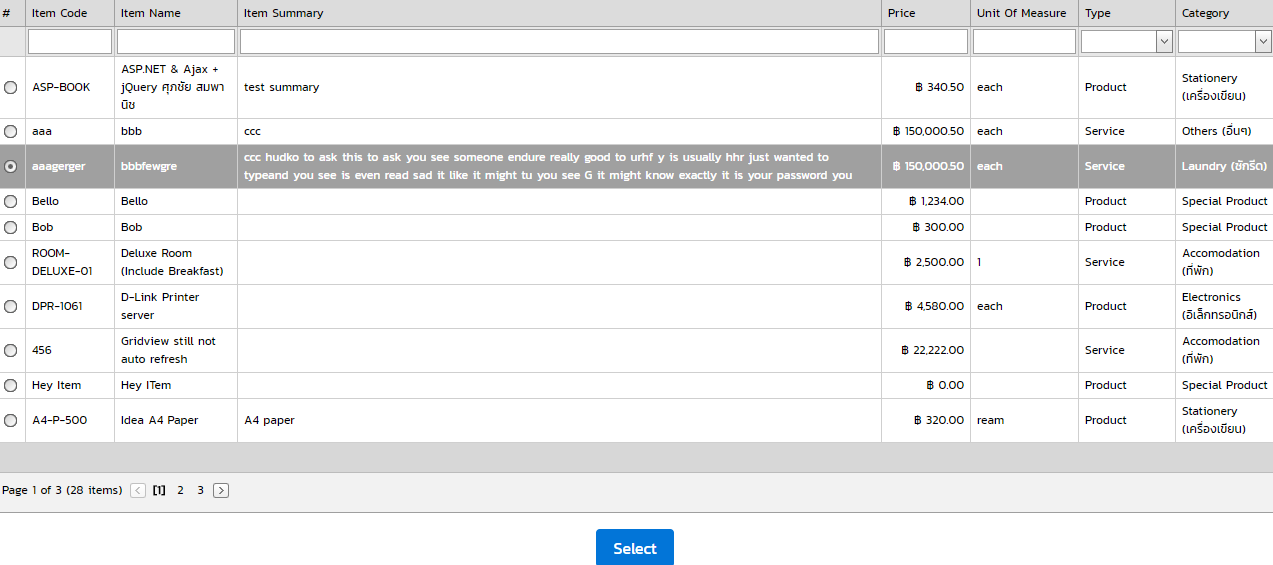 In the pop-up, the user can select which item they want to put in the invoice by selecting the checkbox on the left. Then press the blue "Select" button to add the item to the invoice.
Adding Multiple Items
Multiple items can be added by clicking on "Add multiple items" (1), the user will receive a pop-up that looks like the image below:
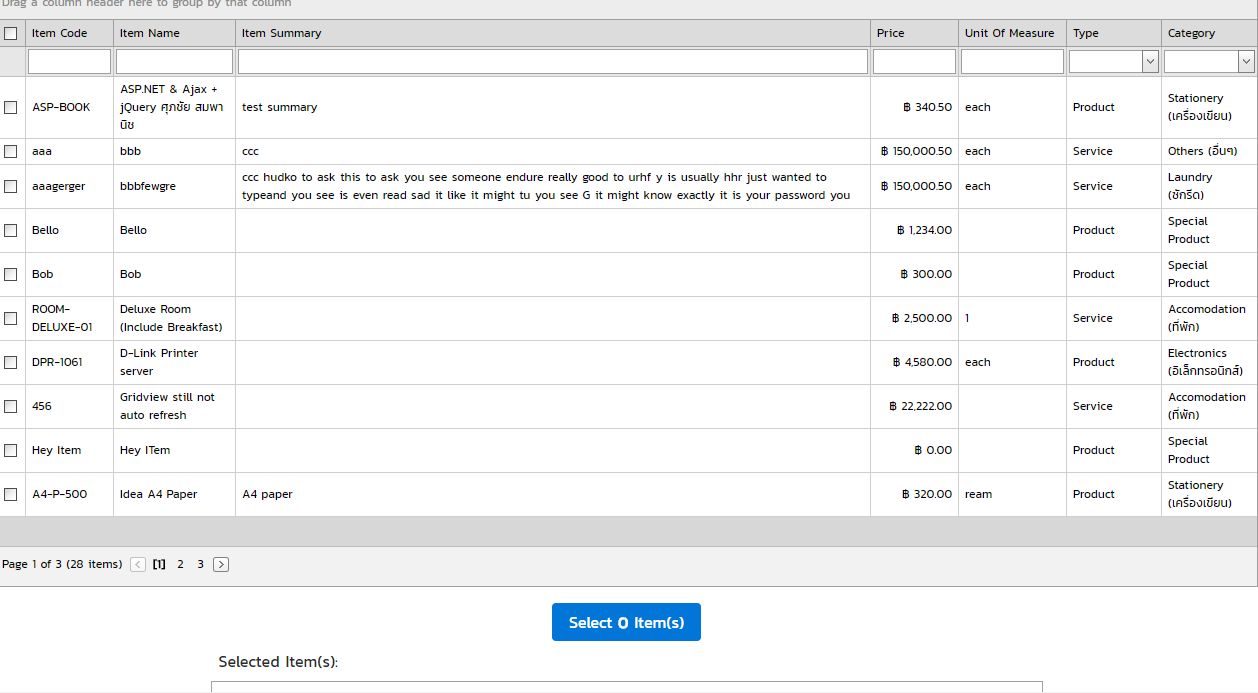 In the pop-up, the user can select which item they want to put in the invoice by selecting the checkbox on the left. The selected item(s) will then appear in the "Selected Item(s)" box at the bottom of the page, there the user can confirm the details again before clicking on the blue "Select x Item(s)" button.
Managing the added item(s)

Note:
Number shown in the image above will now be referenced with ( ). For example, when the author writes (1), please refer to where the number 1 in the image is.
Price and Quantity can directly be changed by simply changing the values in each column, the Amount column's value will be updated automatically to reflect the changed price and/or quantity. Note that that this change will not affect the value stored in the item's database.
Click and hold the button at (2) and dragging it up or down allows the user to reorder the order in which the item will appear in the invoice.
By clicking the 🞨 button in (4), the user can clear the contents of the associated row
Clicking on "-" in (5) will delete the row from the invoice and clicking on "+" will add a row below it.
Adding additional charges
The user can also add additional charges to the item by filling out the information in the fields shown below:
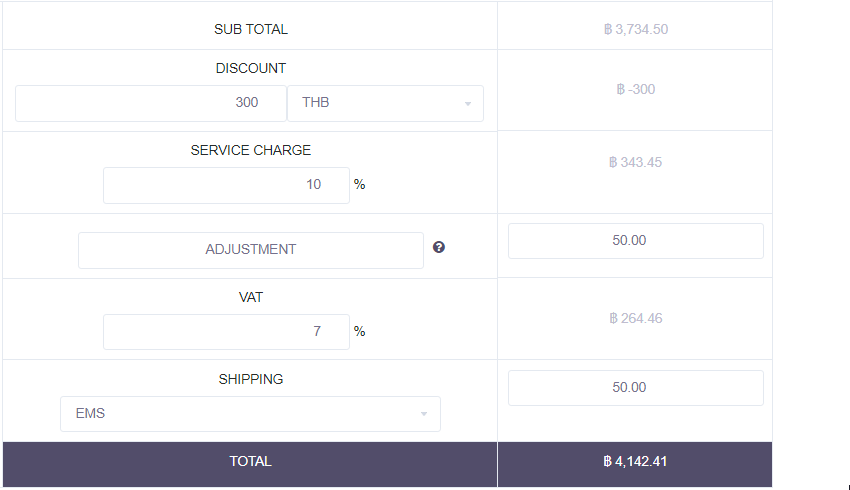 In the "DISCOUNT" field, the user can choose whether to offer a discount as a percent or amount by selecting the dropdown menu to the right (where THB is currently shown in the image).
The user can also choose to select a shipping method stored in the Merchant Settings page and in Delivery Options, which will automatically input the amount upon selection or manually insert the amount on the right.
The "ADJUSTMENT" field provides the ability for the user to input any other additional charges not listed above. The user can name the charge however they want and set the amount for it.
Payment Option, Notes, Terms & Conditions
The final section of this page is to include payment option, notes and terms & conditions for the invoice. Note that the payment option must be selected or else it would not be possible to send the invoice
Terms & Conditions and Notes are optional. The user can press enter the enter key on the "Terms & Conditions" and "Notes" boxes to increase the height of the box.
